Dynamic Block Content with Metafields
Metafields are a way to add dynamic content to your Mojave theme. This can be used in combination with the Metafields or any other pages to generate dynamic content and connect with storefront features.
In this guide, we will use metafields and dynamic content to include Material & Care content.
There are two options on how to configure this dynamically. If you would like to have the ability to have specific styling on the content, we suggest using the pages method. If you would like to make things easier to manage, you can use the metafields option.
Dynamic content using metafields
Add a new metafield definition
- In your Shopify admin, open Settings
- Open Metafields
- Open Products or Variants
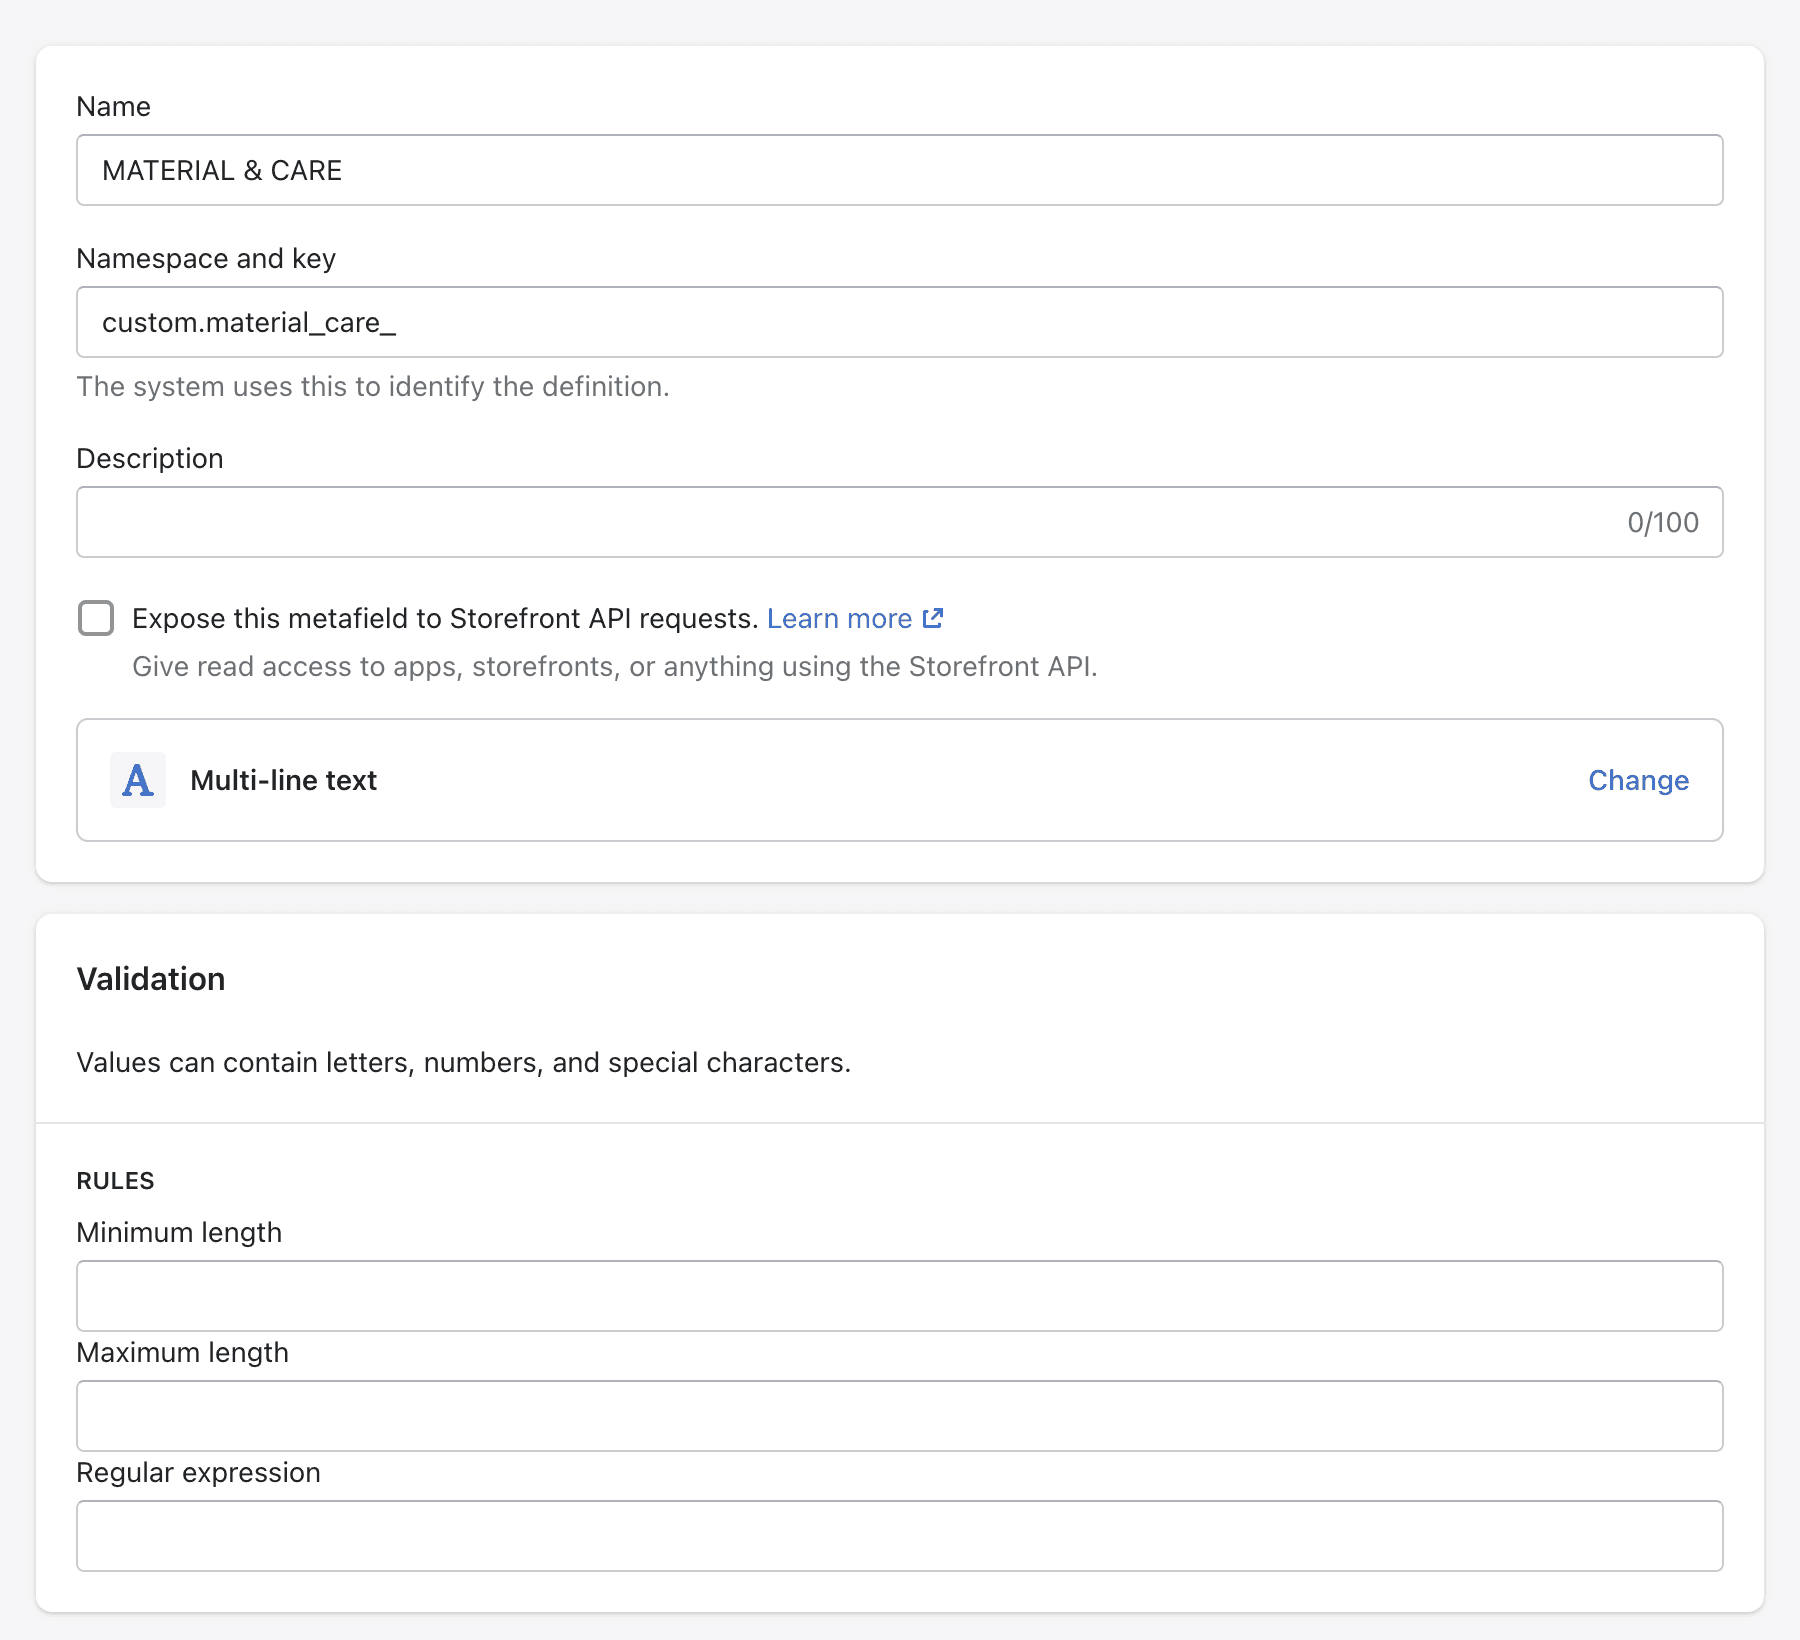
- Select Add definition
Each metafield definition needs a Name, Namespace and key, and Description for internal reference.
Click (+) Select content type to choose:
- Color
- Date and time
- File
- JSON
- Measurement
- Number
- Rating
- Reference
- Text
- True or false
- URL
For this example setup, we need a Multi-line text content type to provide the Material & Care content for relevant products.
Save, then go to your Products admin.
Managing your content
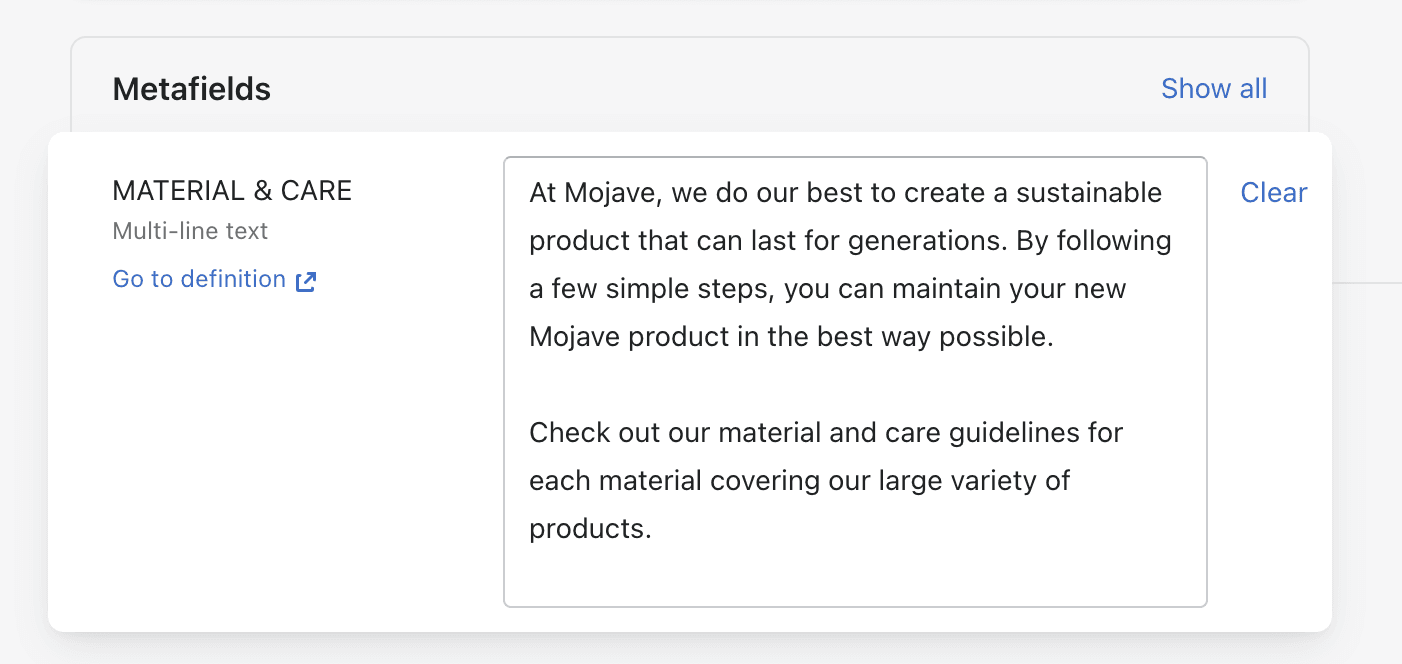
In your Product admin, open a product to insert the content you would like to showcase dynamically per product. Scroll down to Metafields, then enter the Material & Care content for the new metafield.
Save, then go to the Themes of the Online Store.
Connect your dynamic field to the right block
Open the theme editor (Customize), then open your product page template.
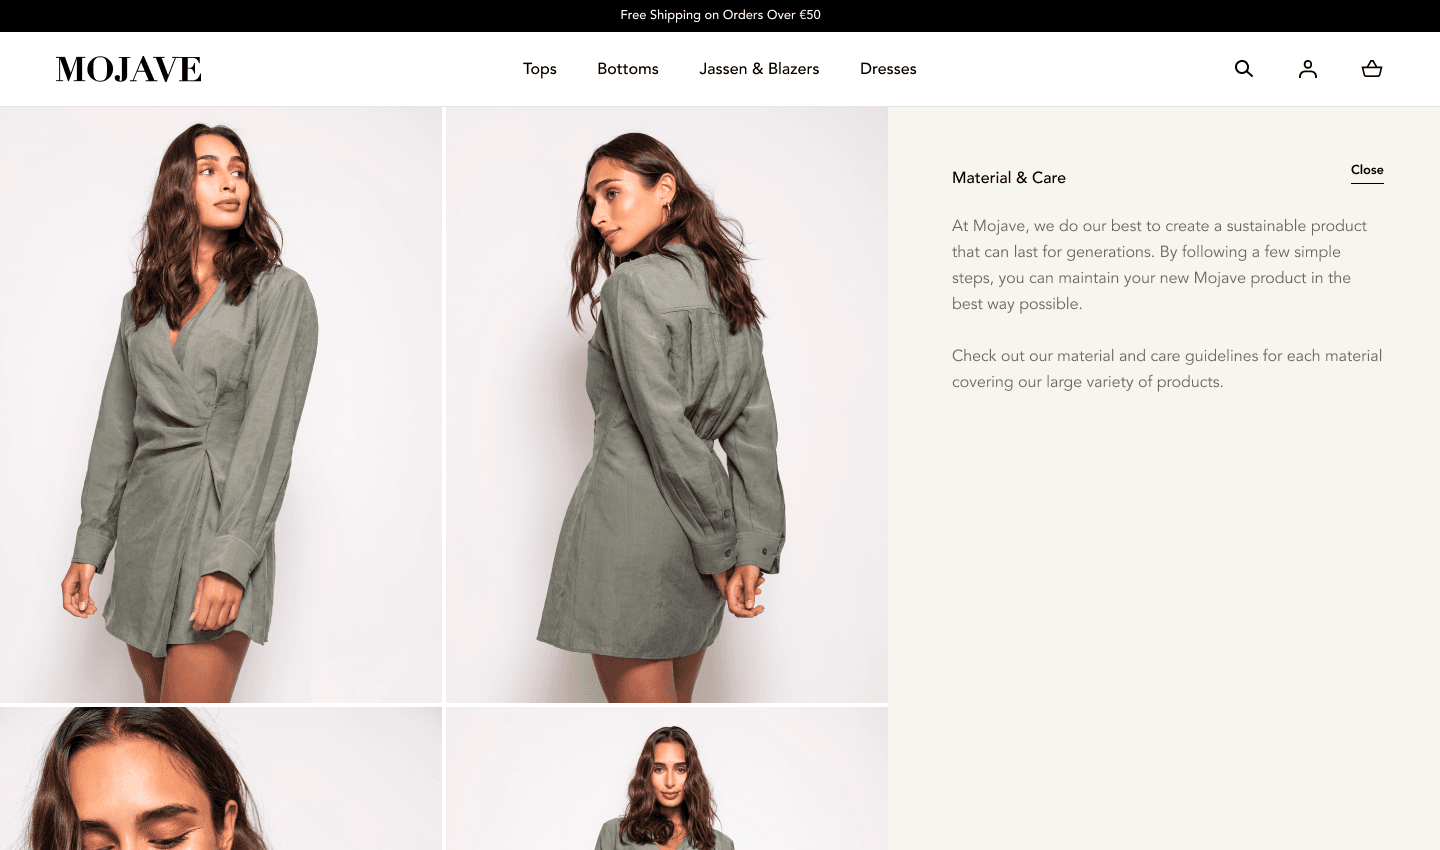
Metafields are connected to blocks or sections on pages. For this example, we are connecting the dynamic content for the Material & Care metafield with a Pop-up link text block.
- Click on “Material & Care” block
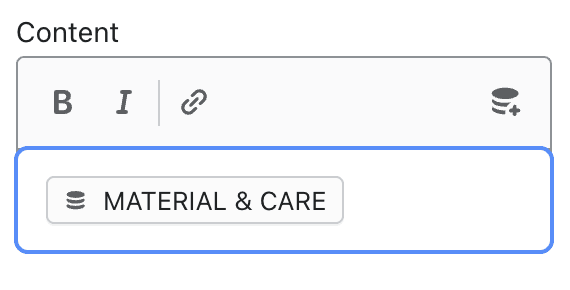
- On the content field, click on the “Insert dynamic source” icon.
- Select the recently created metafield option from the list.
At the end, it should look like this:
Save your changes.
Contact UsWas this article helpful?
Have more questions? Submit a request